


Recherche dans le blog
Water Softeners
What is a water softener used for?
- What is a water softener?
- Why should you remove limescale from water?
- Does this affect me? Do I need a water softener?
- Is installing a water softener complicated?
- How do I adjust my water softener?
- What comes next?
- Reason No. 1: Rediscover the true feel of water on your skin
- Reason No. 2: Protect your pipes and your wallet
- Reason No. 3: Protect your household appliances
- Reason No. 4: Stop using excessive amounts of cleaning products
The impact of limescale on your bills
How do you choose your water softener?
The different types of water softener valves
TUTORIAL: Connecting your water softener to the water supply
VIDEO: Installing your water softener
- The different buttons on the water softener valve
- Programming your water softener
- Manually regenerating your water softener
Recommendations before installing a water softener
- Choosing the right location for your water softener
- Thoroughly checking your water softener before installation
- A minimum pressure is required
- Protecting your water softener
- Tools for installing your water softener
- Accessories for installing your pre-filter
Water softener diagram and components
- Water softener installation diagram
- The different components of a water softener
- How a water softener works
- The regeneration process
- Where should you install a water softener?
Connecting Your Water Softener to the Water Supply
Step 1: Check the water pressure
Check the water supply pressure: it must be a minimum of 2.5 Bars and a maximum of 6 Bars. The water temperature must be between 5 °C and 40 °C.
Step 2: Shut off the water supply.
|
Before working on your water supply system, shut off the supply and open a faucet to release the pressure. Wait long enough for water to stop coming out of your water supply pipe. |
Step 3: Position your water softener
First, choose a location for your water softener. This location must be upstream of all household appliances, including your water heater, because a water softener only treats cold water. You also need enough space to install the pre-filter upstream if you have chosen that option. You also need access to a drain to discharge water during resin regeneration.
 |
 |
 |
Step 4: Prepare your piping
Once you have chosen the ideal location, determine the required width and cut your copper pipe on both sides using a pipe cutter. Be careful not to remove too long a section, so that the flexible hoses supplied with your water softener are long enough to connect it on each side. When cutting the copper, place a bucket underneath to avoid soaking your floor. Once you have a clean cut, sand the end of the pipe with steel wool to ensure a watertight seal during the following steps.
Place a compression fitting on each end as shown in the photos below:
 |
 |
Start by hand, then tighten using an adjustable wrench and tongue-and-groove pliers.
Step 5: Connect the pre-filter
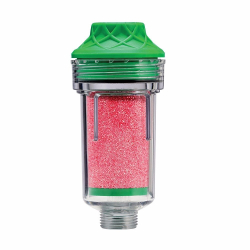
If you have one, install the pre-filter upstream of your water softener, on the water supply side. To do this, add an O-ring to one of the 3/4" nipples and screw it into the pre-filter inlet; do the same at its outlet with a flexible hose that you will need in addition to those supplied with your water softener.
Step 6: Connect the water softener
All our water softeners come with a bypass system that allows hard water to flow through your pipes when needed.
Connect the flexible hose coming from the pre-filter or directly from the water supply to the water softener inlet (IN), after checking that there is a flat gasket at the end of the hose. Tighten without forcing, using an adjustable wrench and tongue-and-groove pliers. Do the same with the other flexible hose at your water softener outlet (OUT). Feel free to turn the water on while monitoring the connections to check that they are watertight.
Step 7: Add salt
Fill your water softener's tank to about half its height. This salt will clean your resin each time it regenerates.
Step 8: Plug in and adjust your water softener
You will find instructions for this step in this article, by clicking here
Have a question? Need advice?
Call us at 09 72 55 18 50. Our technical service team will be happy to guide you through equipping your home with a water softener.
We deliver and install your water softener in several cities and regions:
- Published on
- Water Softeners
Related products
Related blog posts
>-

The Different Types of Water Softeners
Hard water wreaks havoc on pipes and household...
-
The Different Types of Water Softeners
Hard water wreaks havoc on pipes and household...